- Store
- Products
- Downloads
- Resources
-

Best Workflow for Editing Zenmuse X5/X5R 4K in Final Cut Pro
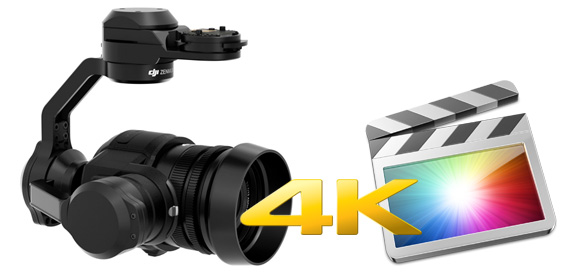
With the announcement of Zenmuse X5 and X5R, two new MFT cameras designed for drones, DJI has made a significant boost in their offer aimed at professional aerial filmmakers. X5 as the 'world's first mirrorless, compact Micro Four Thirds camera made specifically for aerial photography and cinematography' and X5R 'the world's first Micro Four Thirds aerial camera capable of recording lossless 4K videos in RAW.
After recording 4K video footage with the two aerial cameras, you may wish to polish the video with some NLE editing program such as Final Cut Pro on Mac. Although Final Cut Pro has official claimed its powerful processing capability of 4K video, it still be tricky when working 4K files with Final Cut Pro due to its high compressed nature and you may encounter video disordered, picture stunning and some other problems. For this case, the recommended suggestion is to transcode Zenmuse X5/X5R 4K video to Apple Prores codec, which is specially designed for high quality and high performance editing in Final Cut Pro.
The process is surprisingly easy and can be done with the help of Brorsoft 4K Video Converter for Mac. The program lets you convert Zenmuse X5 X5R 4k video to Apple ProRes encoded MOV, which ensures maximum editing quality and efficiency when importing videos to Final Cut Pro (no matter Final Cut Pro 6, Final Cut Pro 7 or Final Cut Pro X) on Mac(EI Capitan Included) in a few clicks. Besides that, you can also utilize the program to do some basic editing functions for you such as video trimming, cropping, applying special effects, adding watermark as you like. Below is a brief how to.
READ MORE:
Zenmuse X5S H.265 to Davinci Resolve
Zenmuse X4S 4K to Premiere Pro/FCP/Avid
DJI Mavic Pro 4K in FCP/Premiere/Avid
DJI Inspire 2 4K in FCP/Premiere/Avid
DJI Spark Video to FCP/Premiere/Avid
DJI OSMO 4K to FCP/Adobe Premiere/Avid
Converting Zenmuse X5/X5R 4K footage for editing with Final Cut Pro
Step 1: Add Zenmuse X5/X5R 4K video files.
Click the "Add Video" button or "Add from folder" button to import source Zenmuse X5/X5R 4K video files to the program. You can add multiple video clips at one time.

Step 2: Choose output file format.
Click the "Format" bar and select "Final Cut Pro" > "Apple Prores 422 (*.mov)" as output format. If your Mac is a little old or slow, you can choose to select "Apple Prores 422 (LT) (*.mov)" or "Apple Prores 422 (Proxy)" to save your bandwidth, if your computer is fast enough or you wish to do some high performance editing work, "Apple Prores 422 (HQ) (*.mov)" or "Apple Prores 422 (*.mov)" is more preferable.

Step 3 (optional): Adjust the video, audio settings
Click "Settings" to fix the frame rate, bitrate, video size, etc to your needs. If you want to edit in Final Cut Pro without having to render the clips while editing, all the frame sizes must be the same as the sequence settings.
Step 4. Convert Zenmuse X5/X5R 4K to Apple Prores.
Click the "Convert" icon under the preview window, it will start to convert Zenmuse X5/X5R 4K video to FCP supported Apple Prores format.
After the conversion, launch Final Cut Pro, choose File > Import > Files..., locate and find the folder where you save the converted video clips. Then start Zenmuse X5/X5R 4K video to FCP professional post workflow with no difficulty.
Related Products
Video Converter for Mac


Useful Tips
- 5 Best 4K Video Converter for Mac
- Best 4K Video Downloader
- 4K Ultra HD Video Converter
- Downscale 4K to 1080p
- 4K workflow with FCP
- 4K workflow with iMovie
- 4K workflow with Avidemux
- 4K workflow with Premiere Pro
- 4K workflow with Avid MC
- 4K workflow with Sony Vegas
- 4K Workflow with After Effects
- 4K Workflow with DaVinci Resolve
- 4K Workflow with Premiere Elements
- 4K Workflow with Movie Maker
- 4K Workflow with EDIUS
- 4K Workflow with HitFilm
- 4K Downscaling to 1080p
- 4K Workflow with PowerDirector
- 4K Workflow with Pinnacle Studio
- 4K AVC-Intra to Premiere Pro
- DJI Mavic 2 Pro 4K in Premiere Pro/FCP/Avid Media Composer
- Upload 4K Videos to YouTube
- Upload 4K Videos to OneDrive
- Play 4K in VLC
- Play 4K in Plex
- Play 4K in QuickTime
- Play 4K on Android
- Play 4K on Xbox One S
- Play 4K on Apple TV 4K
- Play 4K on Vizio TV via Kodi
- Play 4K on Shield TV via Plex
- Play 4K on PC without Lag
- Play 4K in Windows Media Player
Social Connection
Copyright © 2019 Brorsoft Studio. All Rights Reserved.