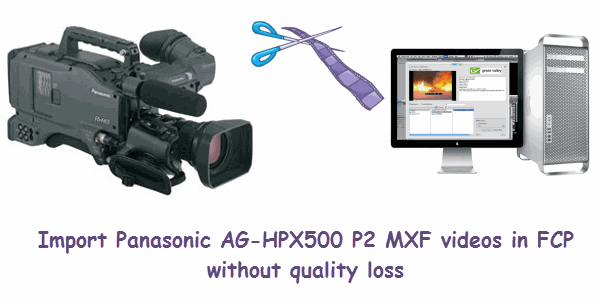
The AG-HPX500 P2 HD shoulder-mount camcorder delivers a unique combination of high-end features never offered in a camcorder in this genre, including production-quality 2/3" progressive 3-CCDs, DVCPRO HD quality, multi HD and SD formats, variable frame rates, and four independent audio channels. In addition, the HPX500 offers the outstanding benefits of P2 solid state recording including ultra-fast IT workflow and no-moving-parts reliability, which makes the camera ideal for use in harsh environments.
The Panasonic AG-HPX500 as the previous P2 camcorders, Records videos in 1080/60i, 50i, 30p, 25p and 24p; in 720/60p, 50p, 30p, 25p, and 24p; and in DVCPRO50, DVCPRO and DV.
As a professional camcorder, there is no doubt that Panasonic AG-HPX500 camcorder can capture the superb videos and photos for the users. That’s the reason why it is hot on market.
However, the users may not so familiar with the video format that Panasonic AG-HPX500 recorded. They will meet the error problem while importing the P2 MXF to FCP. In a word, it is hardly for Final Cut Pro to recognize and support AVC-Intra MXF videos owing to the different codec and high rate compression.
“Recently, I bought a Panasonic AG-HPX500 camcorder. I am satisfied with the video effect that brought to me. But when I tried to edit these videos in FCP 7. An error window pops up. What’s wrong? Does FCP 7 support Panasonic AG-HPX500 MXF videos?”
To edit the Panasonic AG-HPX500 MXF in FCP smoothly, you can download Brorsoft MXF Converter Mac to help you finish the work. This kind of professional converter is specially designed to convert MXF videos for editing and playing.
Free download MXF Converter on Mac:
 (Note: Click here for OS X 10.5.8)
Guide: How to Convert Panasonic AG-HPX500 MXF files to Apple ProRes for FCP editing
Step 1: Load MXF files
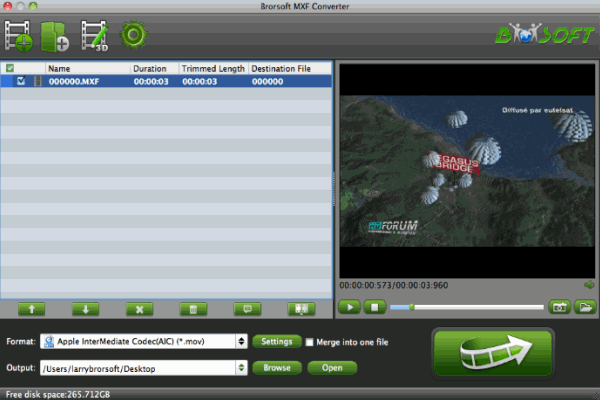
Run the Mac MXF Converter to click "Add" button to load your original MXF videos from Panasonic AG-HPX500.

Step 2: Set the proper output format.
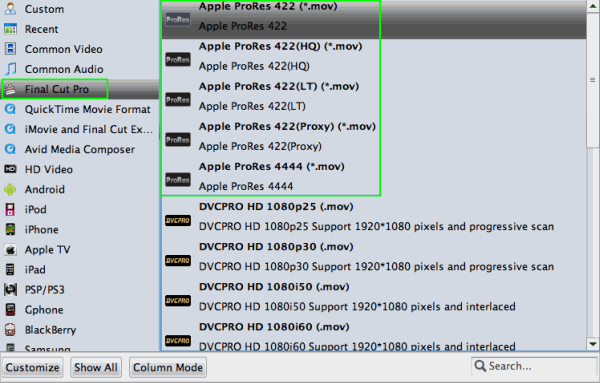
For FCP editing smoothly, choose “Final Cut Pro> Apple PreRes 422" as the output format.

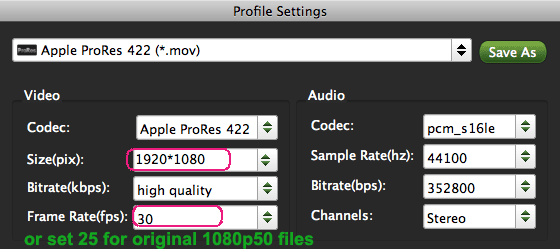
Tip: You can click the “Settings” icon to customize the video/audio settings for Final Cut Pro: 1920*1080 vide size; 30fps frame rate(for original 60fps videos) or 25fps frame rate(for original 50fps videos).

Step 3: Start Conversion
Click “Convert” button on the main interface to start transcoding Panasonic AG-HPX500 MXF to ProRes for Final Cut Pro on Mac OS X.
The conversion will be finished soon. Once it is finished, you can click “Open” on the main interface to find the Apple ProRes MOV videos for FCP for further editing without problem.
Related guides:
How to import P2 MXF footage to Davinci Resolve
How to ingest P2 MXF files into iMovie
How to transcode P2 videos to Sony Vegas with Raylight Ultra
 Trust ourselves & embrace the world!