- Store
- Products
- Downloads
- Resources
-

Tips for Editing CamStudio Video in Premiere Pro
CamStudio is a free screen capture tool that can be used in the creation of tutorials, demos, and such. The software renders videos in an AVI format. It can also convert these AVIs into Flash Video format, embedded in SWF files. After recording some AVI videos using CamStudio, chances are you want to make them more stylish via Premiere Pro or other editing software before uploading to Twitter or posting on Facebook, only to find these AVI footage from CamStudio won't import into Premiere Pro? Well, it's very common not only for you when editing CamStudio footage in Premiere Pro. What's the matter? Is there any way to solve this problem?
Actually, Adobe Premiere Pro has the ability to support AVI format. However, AVI is a container format with different video audio codecs. In general, Premiere Pro won't import AVI files captured from CamStudio, Fraps, Dxtory or other source encoded in Xvid, Dvix format smoothly. In order to get rid of this issues for good, the best and easiest solution is to convert AVI to a more editing-friendly codec for Premiere Pro like MPEG-2.
Read More: CamStudio and Sony Vegas Codec Issue
For the purpose of converting CamStudio AVI footage to MPEG-2 for editing smoothly on Premiere Pro, more than one user chooses to adopt the professional yet easy-to-use Brorsoft Video Converter. With it, you can effortlessly encode/re-encode AVI for smoothly importing and editing in various non-linear editing systems (NLE) including Premiere Pro as well as Sony Vegas Pro, Windows Movie Maker, Pinnacle Studio, Cyberlink PowerDirector on Windows. For working CamStudio AVI clips in Adobe Premiere on Mac, the best option for Brorsoft Video Converter for Mac. Below is the detailed guide for you.
Converting CamStudio AVI recordings to MPEG-2 for Premiere Pro
Step 1: Launch the AVI to Premiere Pro Converter; click "Add" button from main menu to browse your computer hard drive and select the AVI files you want to convert. Or you can easily drag-and-drop files into this application for converting.

Tip: You can check the "Merge into one" box to merge several avi video files together for easier editing.
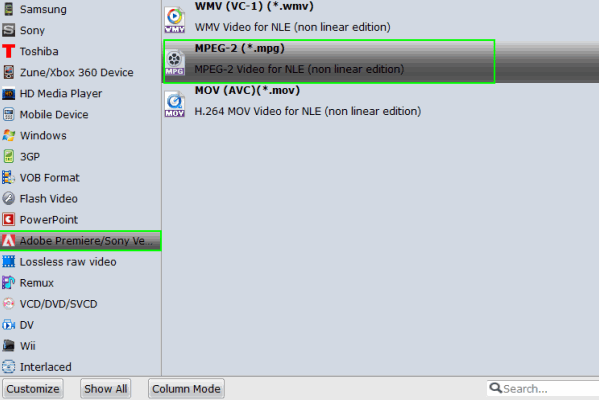
Step 2: Hit the "Format" bar and select Adobe Premiere/Sony Vegas > MPEG-2 (*.mpg) as output format on the drop-down menu.
Step 3: Click "Settings" button if you'd like to customize advanced audio and video parameters like Video Codec, aspect ratio, bit rate, frame rate, Audio codec, sample rate, audio channels.
Step 4: Click "Convert" button to start encoding AVI files to MPEG-2 for Adobe Premiere Pro.
Related Products
Video Converter for Mac


Useful Tips
- AVI to iTunes Library
- AVI to YouTube
- AVI to QuickTime Mac
- AVI to Final Cut Pro
- AVI to iMovie
- AVI to DaVinci Resolve
- AVI to PowerDirector
- AVI to Premiere Pro
- AVI to Premiere Elements
- AVI to After Effects
- AVI to Pinnacle Studio
- AVI to Avid Media Composer
- AVI to Windows Movie Maker
- AVI to Sony Movie Studio
- AVI to Sony Vegas Pro
- AVI to PowerPoint Presentation
Social Connection
Copyright © 2019 Brorsoft Studio. All Rights Reserved.