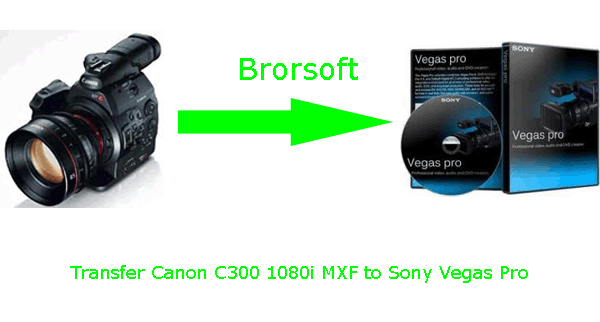
Transfer/Import Canon EOS C300 1080i MXF to Sony Vegas Pro
What captures cinema industry professionals' eyes firmly from 2011 to 2012? Canon EOS C300 Cinema EOS Camcorder, the amazing interchangeable-lens video camcorder, successfully brings Canon's expertise and decades of experience designing sensors, lenses, image processing and design to the world of motion picture capture and starts Canon's step to Hollywood. The all-new camcorder features a unique Super 35mm Canon CMOS sensor, revolutionary Canon DIGIC DV III Image Processor and 50 Mbps 4:2:2 codec, which can provide outstanding cinema quality movie capture.
Mostly notably, Canon EOS C300 (simply Canon C300) , with its MPEG-2 Full HD (MPEG2 422@HL compliant) compression, employs 4:2:2 color sampling for high-resolution performance that minimizes the appearance of “jaggies” at chroma edges. Additionally, with a maximum recording rate of 50 Mbps, the camera supports the recording of high-quality video. In order to widen the compatibility with NLE, the files' MXF wrapper brings together video, audio, metadata, and timecode in a package that enjoys robust support from all professional editing programes. But there is still problems when Canon C300 users want to import Canon C300 1080i MXF to Sony Vegas Pro for editing, since Sony Vegas Pro can only support Sony MXF files.

Then how can the users edit Canon C300 MXF recordings in Sony Vegas Pro? You can only as a third party software for help to bridge Canon C300 MXF files with Sony Vegas Pro. Thus, you can convert Canon C300 MXF files to MPEG-2 for editing. Considering that the 1080i files will look jerky in Sony Vegas Pro, the MXF to Sony Vegas Pro Converter will be more than good if it is capable of deinterlacing 1080i files. Here recommended the top MXF to MPEG-2 Converter. It can not only convert Canon C300 MXF files to MPEG-2, but is professional in deinterlacing 1080i MXF files. In addition, the powerful MXF to MPEG-2 Converter is also designed with some useful editing features, including merging several videos into one file, cropping video size, trimming video clips and adding special effects and text/image/video watermarks to output videos. What's more, thanks to its CUDA/AMD accerlation technology, it is 3X~5X than other common converters. Thus, it is on the top choice for the Canon C300 users.
Now, you can follow the guide on how to deinterlace and transcode Canon C300 1080i MXF to MPEG-2 with the MXF to MPEG-2 Converter step by step. After that, you can edit Canon C300 MXF recordings in Sony Vegas Pro without any problem.
Step 1: Import Canon C300 MXF recordings to the best MXF to MPEG-2 Converter
Connect your Canon C300 to your PC with USB2.0. Launch MXF to Sony Vegas Pro Converter and then click the adding button to add your MXF files to it. (Note: You should find the MXF videos from one MXF whole structure folder). If it is necessary, you can double click the each file to have a preview.
Tips:
1. If you want to merge MXF files, just need to check the “Merge into one” box.
2. You shouldn’t move the single MXF video out of the whole MXF whole structure folder, or the MXF video would be wrong such as without audio.
Step 2: Select an output format for Sony Vegas Pro and set the output folder.
Click on the dropdown menu of “Format” and then move your pointer to “Adobe Premiere/Sony Vegas”, and choose MPEG-2 as the output format from the profile list which is the Sony Vegas Pro compatible video format. Afterwards, you can set the output folder. Besides, WMV (VC-1) (*.wmv) and MOV (AVC)(*.mov) are also options for you.
Step 3: Click “Settings” icon to adjust audio and video parameters.
Click the “Settings” icon and you will go into a new interface named “Profile Settings”. You can adjust codec, bit rate, frame rate, sample rate and audio channel in the interface according to your needs and optimize the output file quality.
Note 1: You’d better keep your original video size and set the frame rate as 30fps for adding Canon C300 MXF footages to Sony Vegas Pro.
Note 2: You can click Edit and then you can deinterlace 1080i MXF files in the Video Editor.
Step 4: Strat to deinterlace and convert Canon C300 MXF files to MPEG-2.
Click the button for "Convert" and then you can deinterlace and transcode Canon C300 MXF files to MPEG-2 immediately with the CUDA/AMD acceleration support. You can find the process in the “Conversion” interface.

When the MXF to MPEG-2 conversion process is 100% completed, you will be able to get the output files for Sony Vegas Pro by clicking on “Open” button effortlessly. Now you can easily put the converted and deinterlaced Canon C300 MXF 1080i files to Sony Vegas Pro for editing with high quality without any trouble.
Tip: The MXF to Sony Vegas Pro Converter can also help you to convert MXF files to Adobe After Effects, Adobe Premiere, Windows Live Movie Maker, etc. If you want to learn more about, please link to Brorsoft MXF to Sony Vegas Pro Converter Converter and get more info about it.
Get more information about converting Canon C300 footages to Premiere/iMovie/Avid Media Composer
a. Edit Canon C300 MXF in Premiere Pro
b. Put Canon C300 MXF footages in iMovie'11
c. Make Canon C300 MXF editable in Avid MC
d. Import Canon C300 MXF files to Final Cut Pro 7/X
e. Convert Canon C300 MXF files to After Effects
f. Edit Canon C300 MXF footages in FCE
Related MXF guide:
Import Canon XF305 MXF to iMovie
Import Canon XF100 MXF files to FCP X
Import Canon XF300 MXF files to FCP 7/X
Import Canon XC10 footage into Final Cut Pro
Import Canon XF105 1080i MXF to FCP 7 Mac
Convert MXF files to AVI, WMV, MOV, VOB, MPEG, MP4
Convert/Import P2 MXF footage to Sony Vegas Pro 11 for editing
Import/Merge Canon XF100 MXF files to Windows Live Movie Maker
Import/Transcode Panasonic AG-HVX200 P2 MXF files to PowerDirector 10
Useful Tips
- Convert MXF to MOV
- Play MXF in VLC
- Upload MXF to YouTube
- Convert MXF to AVI/WMV/MPEG
- Transcode P2 MXF to ProRes
- Convert Canon MXF to Avid
- Import MXF to iMovie
- Convert MXF to Premiere
- Convert MXF for Mac editing
- Convert MXF to Pinnacle Studio
- Load Sony MXF to Final Cut Pro
- Edit MXF files with Davinci Resolve
- Sync MXF with Pluraleyes 3/3.5/4
- Edit MXF in Camtasia Studio 8/7
Adwards

Copyright © 2019 Brorsoft Studio. All Rights Reserved.


