- Store
- Products
- Downloads
- Resources
-

3 Ways to Export iMovie Projects to Meet Different Needs
iMovie is able to export a movie in a variety of formats, depending on its final intended use. In this article, you will learn about 3 different ways to export iMovie projects: finalize project, save in a digital format or upload online. Now just read on, then it would be easy for you to export iMovie projects to different video formats for playing on devices, share on YouTube for other online websites.
Part 1: Finalize iMovie projects
Part 2: Export iMovie to different formats
Part 3: Export iMovie to YouTube
Part I: Finalize iMovie projects
When you're finished creating a project, you can finalize it. With this process, iMovie prepares (renders) your movie in all of the possible sizes - mobile, medium, large, HD 720p, and HD 1080p- that your project's media supports. (Sometimes, the original project media isn't large enough to render in the largest sizes.) You don't see the finalized files in iMovie; rather, iMovie uses the files when you share a project to a social media website such as Facebook or YouTube. When you finalize a project in advance, the process of sharing a movie takes less time.
Finalizing a project also improves full-screen playback because iMovie also uses the rendered files when you play a project in full-screen mode.
To learn about sharing your movie projects, go to the "Share your video project" section of iMovie Help.
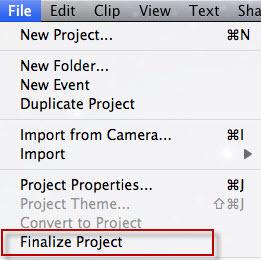
To finalize a project:
1. Click to select a project in the Project Library, or open a project so that it's showing in the Project browser.
You should finalize only projects you consider to be complete because if you make further changes to a movie you've finalized, iMovie discards the finalized versions.
2. Choose File > Finalize Project.
The File menu appears in a light gray bar across the top of your computer screen.
Depending on the size of your project, it can take a while to render all of the sizes. You might want to finalize your project when you'll be away from your computer.
The process is complete when the finalizing dialog disappears.
Part 2: Export iMovie to different formats
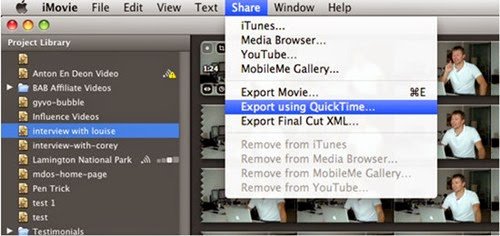
Once you've finished creating your movie, you can export from iMovie to different digital formats. Just go to Share > Export using QuickTime... and select an option from the menu. Something limited, iMovie only support MP4, 3GP, M4V, AVI, FLC, MOV and DV. So if you want to save your iMovie creation to other formats like WMV, FLV, MKV, VOB and more, you have to convert your iMovie video to other formats.
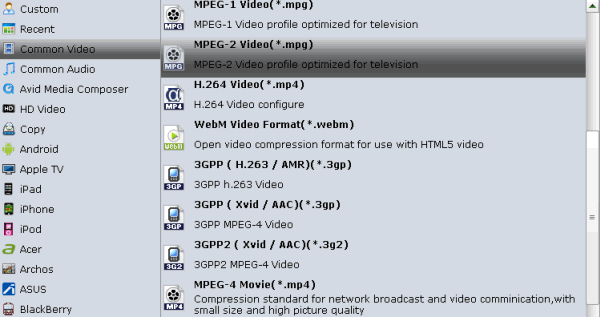
To achieve the goal, Brorsoft Video Converter for Mac- an all-in-one iMovie converter is highly recommended. It converts iMovie videos to various formats like MP4, WMV, FLV, MKV and provides optimized presets for Final Cut Pro, iPhone, iPad, iPod and more.

Export iMovie to MP4 | Export iMovie to AVI | Export iMovie to WMV | Export iMovie to FLV | Export iMovie to MPEG-2
Step 1. Export your iMovie videos by selecting "Export using QuickTime ...">save your videos in MOV or other offered formats.
Step 2. Launch Brorsoft Video Converter for Mac. Click the "Add" button to find the videos that you want to convert.

Step 3. Click on "Format" bar, and select output format from the drop-down list.
Step 4. Click the "Convert" button to start converting your iMovie to a format you want.
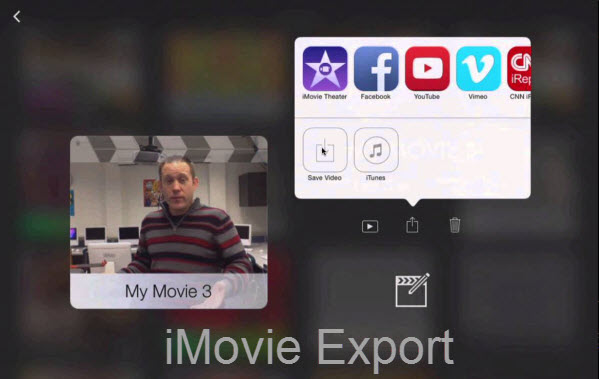
Part 3: Export iMovie to YouTube
In additional to export iMovie to videos for playback on devices, some guys would like to share with others online. Here you can learn how to share iMovie video to YouTube.
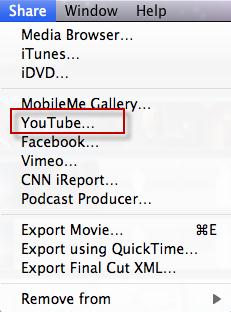
Step 1. Choose a movie to upload and open YouTube sharing window
Choose a completed movie that you want to upload to YouTube by clicking on it in the Project Library. Then go to the main menu and choose Share > YouTube to open the YouTube upload menu.
Step 2. Fill in your YouTube account and other information
Click the Add button to add your YouTube account and fill in your YouTube account name and password. Then fill in the title, description, tags about your movie. You can choose a category for your movie in Category. These information will make your movie more easily found by others on YouTube. When you finish it, hit "Done" to save.
Step 3.Select the publish size and share iMovie to YouTube
iMovie can upload your movie to YouTube in one of the four sizes, and you can select one as you like. After choosing the publish size, now click "Next" and when the YouTube terms of services open, hit "Publish" to begin to upload iMovie to YouTube to share with family and friends.
When your movie had been uploaded to YouTube, a window as below will open. If you want to tell a friend that you have uploaded one movie to YouTube, you can choose "Tell a Friend" to sent the YouTube link via E-mail. If you want to view your video on YouTube, select "View". And if you just want to return to iMovie, hit "OK".
Related Products
Video Converter for Mac


Useful Tips
- 4K vs 1080p
- iMovie Crash Solution
- How to Export iMovie Projects
- Convert WeChat Audio to MP3
- Batch Convert Videos with Handbrake
- Media Servers & Media Streamers
- Sites to Download MP4 Movies
- Solve MKV No Sound Problems
- Fix Out-of-Sync Audio in VLC
- Speeding up macOS Sierra
- Deinterlace 1080i Video
- Deinterlace Video with Handbrake
- Speed up video conversion
- Brighten A Dark Video
- Stream iPhone Media to TV
- Mirror Your PC on a TV with Chromecast
- Play Any Video on DVD Player
- Import/Export Videos in Premiere Pro
- Compress Videos for Use in Snapchat
- Fastest HEVC/H.265 Decoder and Encoder
- Video Converter for macOS Mojave
- Video Converter for macOS High Sierra
- Video Player for macOS High Sierra
- 5 Best Video Converter for Apple TV 4K
- Top 3 VOB Converter
- Top 3 VR Player for iPhone
- Top 5 MKV to iPhone Converter
- Top 5 Free Video to GIF Converter
- Top 5 Free Video Converter 2018
- Top 5 Free Screen Recorder 2017
- Top 5 Best Free 3D Video Players
- Top 5 Best 4K UHD Video Players
- Top 3 Fastest Video Converter
- Best VOB Players for Mac
- Top 3 WMV Players for Mac
- Free Video Converters for Windows
- Free Video Converters for Mac
- Best MXF Converter for Mac
- Best H.265 Encoder and Decoders
- Top 5 Video Players for Windows
- Top 5 Video Editors in Mac
- Top 5 Video Editors in Windows 10
- Apple ProRes Converter Windows
- Best GoPro Video Converter
- Best 3D Video Converter
- VR Video Converter macOS Sierra
- Best Free MOD Converter
- Top 5 Best MKV Splitter
- Best PVR Video Converter
- DivX Converter Alternatives
- Adobe Media Encoder Alternative
- Apple Compressor Alternative
- Windows Media Player Alternatives
- MPEG Streamclip Alternative
- Best ClipConverter Alternative
- AnyMP4 Video Converter Alternatives
- cTiVo Alternative for macOS High Sierra
- Best VLC Player Alternatives
Video Software Review
Software Alternative
Social Connection
Copyright © 2019 Brorsoft Studio. All Rights Reserved.